

Buying food and building up an emergency long term food storage is one of the keys to your family's ability to survive after a major disaster. The food we regularly buy in the grocery store isn't meant to sit around for years. Manufacturers produce the food with the intention of it being consumed almost immediately. Fortunately with the help of modern technology we can extend the life of many foods for years.
You will want to focus on storing dried foods with this method such as, rice, beans, grains, textured vegetable protein, powdered milk, seeds, and the like. It's possible to preserve these types of foods for upwards of 20 or 30 years if done correctly.
Important: 5 Things That Make Food Spoil
Eliminating these is the key to making your food last for decades!
- Moisture
- Air
- Light
- Heat
- Pests
9 Steps to Maximize The Life of Your Long Term Food Storage
Purchase Supplies
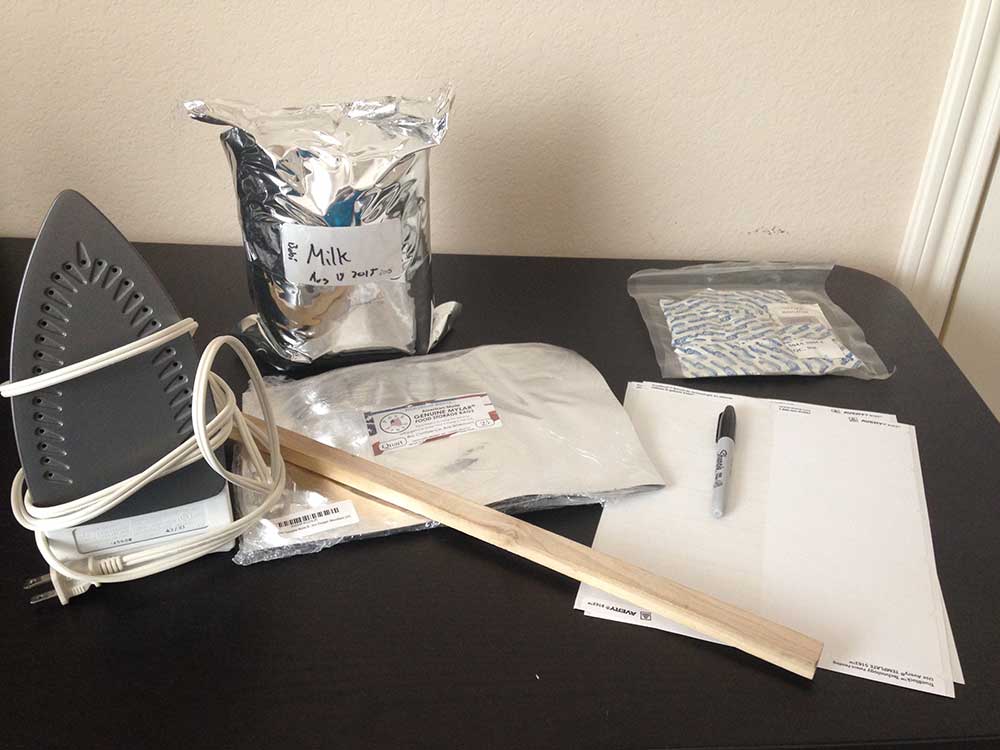
Buy the supplies you will need to repackage the food you buy. It is a good idea to buy in bulk to save money. I recommend buying dry food (grains, beans, etc.) in 25 pound bags from Bob's Red Mill, Amazon, Sams, or Costco.
- Mylar bags w/ oxygen absorbers (5 gallon size) These fit perfectly in the 5 gallon buckets
A standard iron will also be needed to seal the bags. If you use the 5 gallon size mylar bags you will also want to use a vacuum to suck out most of the air before you finish your seal (First partially seal the bag leaving a few inches to fit the vacuum hose, and then finish the seal after the air has been sucked out.) You can also use something like a "FoodSaver" to vacuum out the air and seal the bags but make sure that it is compatible with the bags you buy if you go this route.
Freeze Before Sealing

If you are planning on preserving flour products you might want to consider freezing before preserving. Freeze any flour products for at least 2 weeks before sealing them away will kill any weevil eggs that may be present. Removing the oxygen from the bag before you store it will technically make it impossible for the eggs to hatch, but why take chances?
Place Food In Mylar Bags
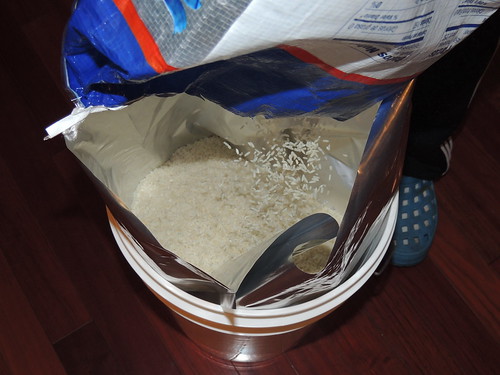
Place your beans, grains and even packaged foods into the Mylar bag. I recommend using either the 1 gallon size or the 5 gallon size. The 1 gallon size is more convenient for using later when you need it. You can make it through a gallon without it going bad or needing to be sealed up again. The advantage of the 5 gallon size is that it efficiently fits in the 5 gallon buckets. It is helpful to add a bay leaf or two to your food to help repel pests. And make sure to leave enough space at the top of the bag for you to seal it.
If you are using the 5 gallon bags first place the bag in the bucket before filling the bag. If you are using the 1 gallon size place it in a pitcher or something of that general shape and size (it will help keep the bag open and standing).
Drop In Oxygen Absorber
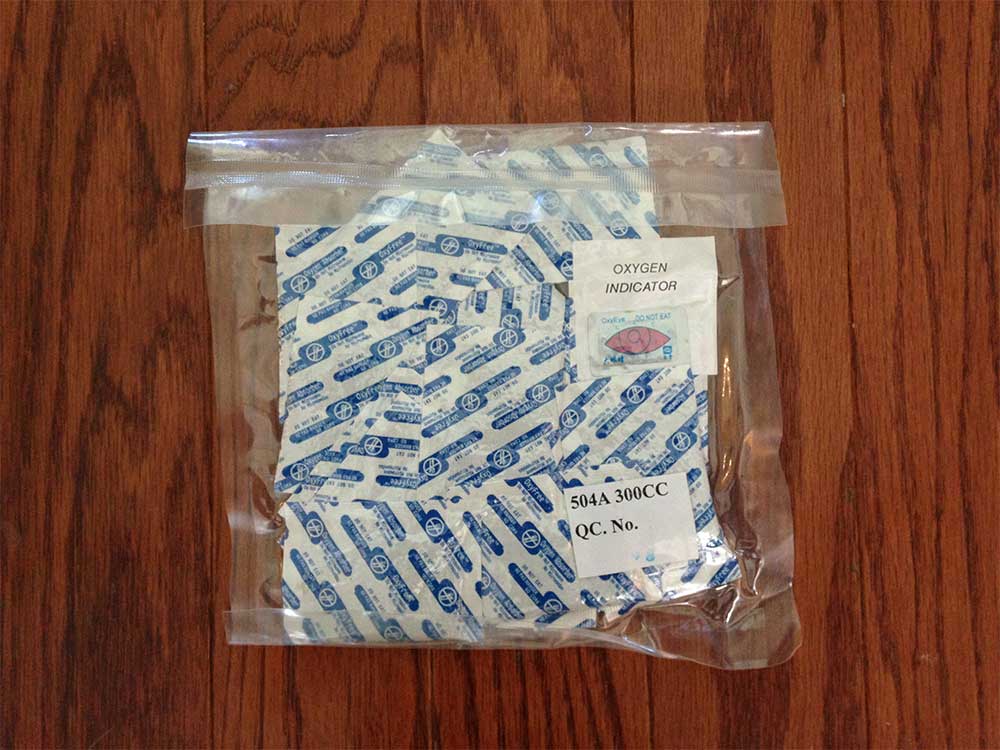
These are food safe and will not harm the food. If you buy them off of Amazon they are usually paired with the appropriate sized mylar bags making life easy. If you buy them separately you will need to refer to manufacturer guidelines to determine how many oxygen absorbers you need per bag.
Remove Air From Bag
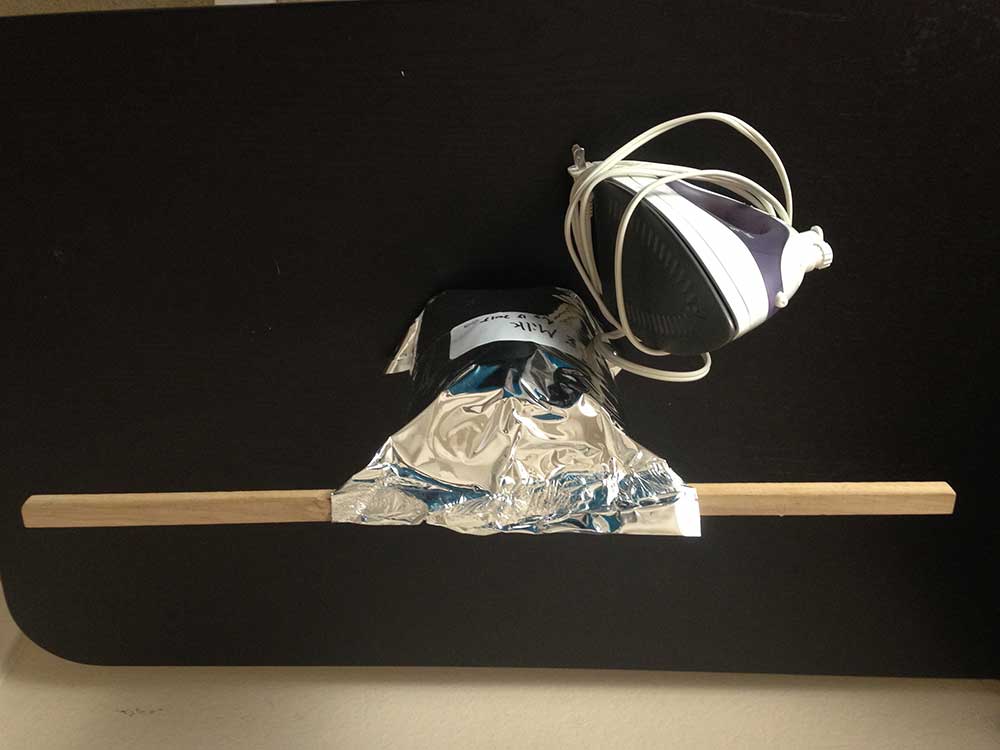
If you are using the one gallon sized bags or smaller you generally do not need to use a vacuum (or FoodSaver) to suck the air out before sealing. If you use a square dowel as pictured in step one you can get enough air out by just rolling the bag down with the dowel until it is tight. Then iron across the dowel to seal it (make sure the dowel is square so there is a flat edge to iron against). The oxygen absorber will do the rest.
If you use the 5 gallon bags you will need to iron across the bag leaving a few inches to fit a vacuum hose in. Vacuum out all the air you can (don't forget to drop your oxygen absorber in either before or after) and then finish ironing across the bag completing the seal.
The bag should be shrunken and in the shape of the food inside when you are finished. Then don't forget to label the bags so you know what is inside.
Pack the contents into a clean bucket
If you are using the 5 gallon bags make sure to place them in the bucket before you fill them. If you are filling multiple smaller mylar bags first, then just make sure you leave enough space at the top to seal the bucket completely.
The Mylar bags will be very compact and allow you to store a lot of food in a single bucket.
Seal Bucket
Place the lids on the buckets and make sure they are tight. You don't want any ants or other pests to climb inside. This also makes them fairly waterproof should the area happen to get exposed to rain or a minor flood.
Add Label
Label the bucket with the items that are inside and the date they were stored. You will want to use the oldest items first when it comes time to use your food storage. If there are 5 bags of pinto beans within, write that on the label. I recommend taping over the label with packing tape to make sure the label doesn't fall off in time (It happens).
Store Buckets
Store the buckets at least six inches off the ground and in an area that is temperature controlled. The buckets should be kept out of direct sunlight as well. Food should be kept between 50 and 80 degrees. Keep an eye on pests and take action if you see evidence of mice in the area. The mice won't be able to chew through the buckets, but you don't want to take any chances.
Following these steps and you should expect to get at least 10 years out of your long term food storage. Many have gotten 20 or more years from less advanced storage techniques from the past.